Top 9 Mold Prevention Tips After A Flood!
Top 9 Mold Prevention Tips After A Flood!
Water is a vital necessity for life. However, when it becomes uncontrolled, it will cause devastation.
Whether your property has been damaged by a torrential downpour, a triggered sprinkler system or busted pipes, it is important to understand that it can cause more problems than just wet materials that may need to be discarded.
In many cases water damage can impact the structure of the property. In addition, the damage to the structure is not just confined to the water line. The drywall, wood, and even concrete used in many structures can act as a sponge which will then cause the water damage to extend much higher and deeper into the structure.
Mold growth is another problem that can occur.
This article has two objectives. First, we explain what water damage restoration is. Second, we provide you with 9 tips to prevent mold after a water damage event in your home or business.
Puritan Restoration is a full service restoration contractor serving Norwood, Newton, Framingham, Cambridge, Needham, Brookline MA and surrounding areas. Please call us 617-527-2229, if you have questions or send us an e-mail.
What Is Water Damage Restoration?
What Is Water Damage Restoration?
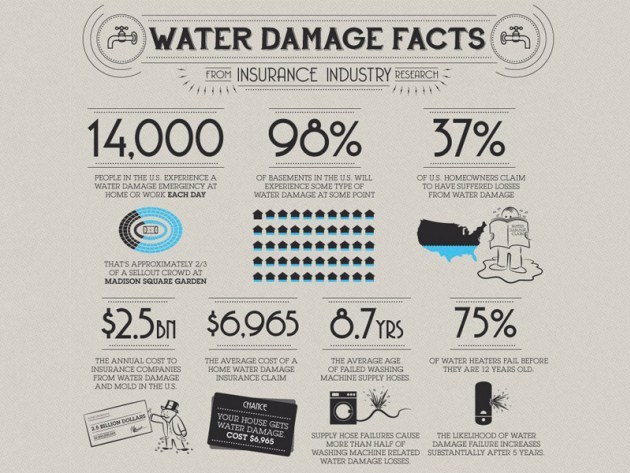
Water damage restoration is a service performed by professionally trained contractors who understand how to effectively restore a property to pre-loss condition after a flood event.
The first 24 to 48 hours are important after a flood event because mold can begin to grow, so it is important that you contact your insurance provider and Puritan Restoration immediately because we follow these steps.
Deploy Specialized Equipment
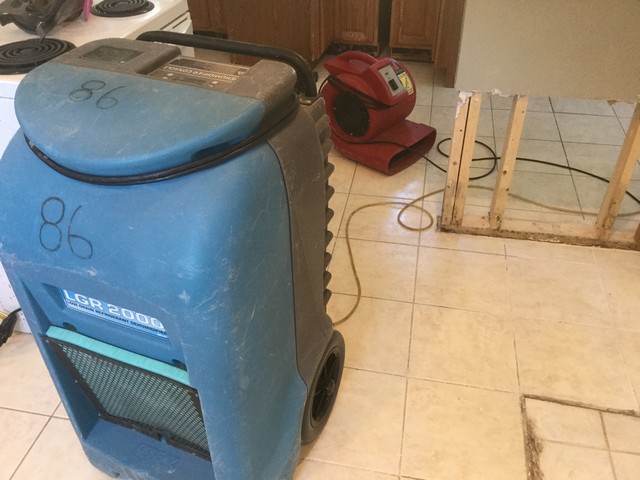
We use specialized equipment to pump out excess water and commercial grade dehumidifiers and air movers to increase drying efficiency.
Determine Class Of Destruction
According to the Institute of Inspection Cleaning and Restoration Certification (IICRC), there are four classes of liquid destruction.
Class 1 Destruction: The lowest and easiest to deal with, this has a slow evaporation rate. Only part of a room or area was affected, there is little or no wet carpet, and the moisture has only affected materials with a low permeance rate, such as plywood or concrete.
Class 2 Destruction: With a fast evaporation rate, this level affects an entire room, carpeting, or cushioning, the wetness has wicked up the walls at least 12”, and there is moisture remaining in structural materials.
Class 3 Destruction: This class has the fastest evaporation rate, and ceilings, walls, insulation, carpet and sub-floors are all saturated. The liquid may have come from overhead.
Class 4 Destruction: This class is labeled as a specialty drying situations, which means there has been enough liquid and time to saturate materials with very low permeance, such as hardwood, brick, or stone.
Determine Category Of Water
There are three distinct categories of water.
Category 1 Water (Clean Water): Water that originated directly from a sanitary source and when exposed to it, either through the skin, inhaled or ingested, does not cause a great deal of harm to humans. Examples of Category 1 Water: broken water supply lines, melting ice or snow, falling rain water, and tub or sink overflows (no contaminates).
Category 2 Water (Gray Water): Defined as water with bacteria present, but no solid waste, carrying microorganisms and nutrients for microorganisms. Category 2 water does have the potential to cause discomfort or sickness if consumed or exposed to humans. Examples of Category 2 water: discharge from dishwashers or washing machines, toilet bowl overflows (urine, no feces), seepage due to hydrostatic pressure, and sump pump failures.
Category 3 Water (Black Water): Water is highly contaminated and could cause death or serious illness if consumed by humans. Examples: sewage, rising flood water from rivers and streams, ground surface water flowing horizontally into homes.
Category 3 water carries many bacteria and viruses that could harm your health including the following: E. Coli; Acanthamoeba; Salmonella; Helicobacter pylori; Leptospira; Cryptosporidium; Giardia; Hepatitis A Virus; Clostridium Tetani; and Adenoviridae.
Illnesses that these bacteria and viruses can cause include:
- Gastroenteritis (cramping stomach pains, diarrhea and vomiting);
- Weil’s disease also known as Leptospirosis (flu-like illness with persistent and severe headache, vomiting, and muscle aches which could damage the liver, kidneys, and blood);
- Hepatitis (inflammation of the liver, and jaundice);
- Acute respiratory illnesses (attacks of breathlessness, chest tightness, wheezing, pneumonia, croup and bronchitis);
- Infections of skin, eyes, nose, throat and ears; and
- Tetanus, a medical condition that affects the nervous system and the reason we get tetanus shots.
Create An Action Plan

Create An Action Plan
The success of any project will depend on the scope of work / plan of action that our Project Managers create, in consultation with your insurance company.
Safety First
The safety of workers and occupants of the home is a priority. With this in mind, one of the key objectives is to assess the potential structural issues caused by the water damage. This step is very important because it will determine if there are any long term safety concerns which will impact the value of the property.
Contents Assessment
Some contents of your home could be salvaged from water damage, but other contents will need to be discarded. Our Project Manager will advise you what possessions can be saved and restored and what can not.
Drying Strategy
A properly thought out drying strategy and implementation is another important step because it will assess how much equipment needs to be deployed and monitored.
Sanitizing Plan and Follow Up Tests
Considering the potential health hazards that category 2 and 3 water pose, our team will also create a sanitizing plan to ensure a healthy living environment.
Once the water is removed, and the sanitation and drying process is completed, we also recommend that air quality tests be done. In addition, if there was category 3 water, then you should also consider investing in a sewage contamination test as well. Both tests should be done before any reconstruction or rebuild begins to verify that the water damage restoration was successful.
These tests are important because there is no point in rebuilding if potential mold or bacteria from category 2 or 3 water is still present. The investment in testing is well worth the cost for long term peace of mind that the restoration was done properly and could save you thousands of dollars.
Now that you understand what water damage restoration is and what to look for when you hire a company, listed below are 9 recommendations to prevent mold from growing in your recently flooded home or business.
9 Tips To Prevent Mold After A Flood!
9 Tips To Prevent Mold After A Flood!
1. Begin The Clean Up Immediately
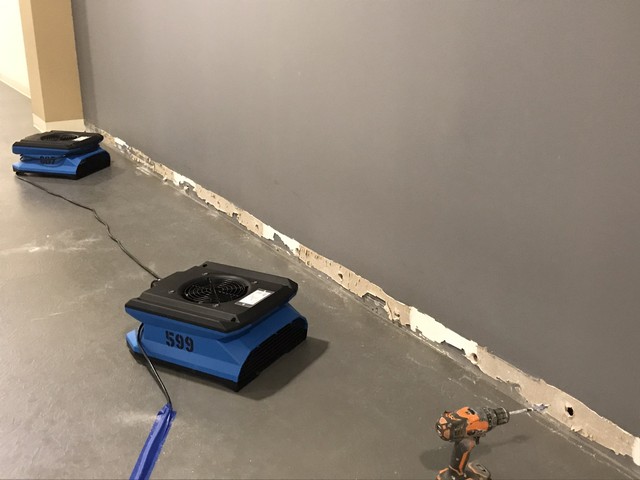
Mold will begin to grow within 24 to 48 hours, so it is imperative that the clean up starts as soon as possible.
2. Hire Licensed Professionals
If your water restoration job does not begin soon enough and mold begins to grow, consult with Puritan Restoration because we are mold removal experts that follow IICRC procedures.
Mold is a health hazard, meaning that if it is not cleaned properly, the spores will become airborne. When this occurs even more area will become contaminated, not to mention as the spore count increases, the risk of health problems grows as more spores end up in your lungs.
3. Completely Gut
Completely Gut
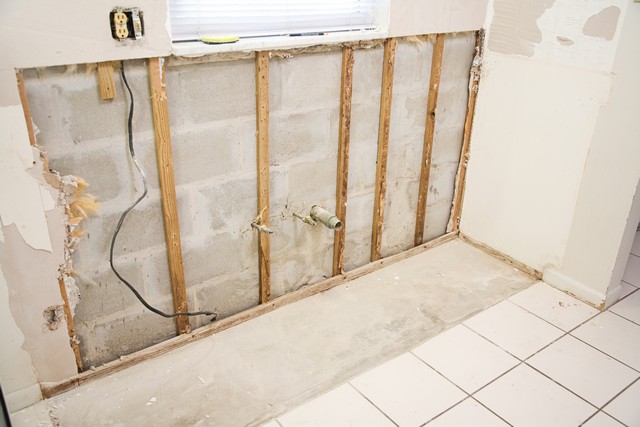
The standard practice recommended by most insurance companies is to only remove one foot of drywall above the flood line. In the short term, this may work. However, this practice could result in long term and costly mold problems because moisture can creep up behind the surface. We recommend that you remove all the drywall because the short term extra cost far outweighs the potential long term cost if mold develops and needs to be removed.
In addition to removing all the drywall, we recommend removal of the following: all flooring, including the sub-floor; insulation because it absorbs moisture; and finally, if the electrical panel was submerged under water, it should be replaced as well.
4. Do Not Use Bleach For Clean Up
As stated by Michael Pinto, CEO of Wonder Makers Environmental:
Perhaps the most misunderstood aspect of bleach when proposed as a cleaner or sanitizing agent is that its effectiveness is greatly reduced in the presence of organic material. To be a successful sanitizer, bleach must be used on clean materials and surfaces. This is why bleach products are used in the laundry after the wash cycle or in a commercial kitchen as a component in the third sink after the dishes have been washed and rinsed. The efficacy of bleach as a sanitizer is also compromised by heat and light. Despite the fact that the chlorine odor may linger for some time after use, bleach loses strength so quickly that it is not considered to have a residual effect that would prevent future bacterial or fungal growth.
5. Insulate Properly
Insulation is particularly important if the flood occurred in your basement.
Mike Holmes, a respected contractor, believes that the most important factor in preventing basement mold is to properly insulate it because it provides a thermal barrier:
When air, which is full of moisture, leaks into that insulation, it will inevitably lead to mould. Here’s why: Your basement, like every room in your home, has its own natural air convection. The air nearest the ceiling is warmer, and the air nearer the floor is cooler. The cold air at the bottom pushes the warm air up. As it rises, it comes into contact with the cooler exterior wall and releases the moisture it’s holding. It condensates. That air and moisture — if it’s able to get into the batt insulation through a gap in the seal — will wick into the insulation. Over time, it will soak that batt to the point that water can drip down the walls and pool on to the floor….You need a thermal break to stop hot from meeting cold….So, use closed cell spray foam insulation or rigid foam insulation, which will provide a thermal break and not trap any moisture. If you’re using foam insulation boards, make sure you Tuck Tape every seam, and spray-foam all corners and joints to create a 100% seal and a perfect thermal break. That way, you’ll know that anything you do inside your finished basement won’t have to be torn out in a few years because of mould.
6. Completely Dry Before Any Rebuild Begins
Completely Dry Before Any Rebuild Begins
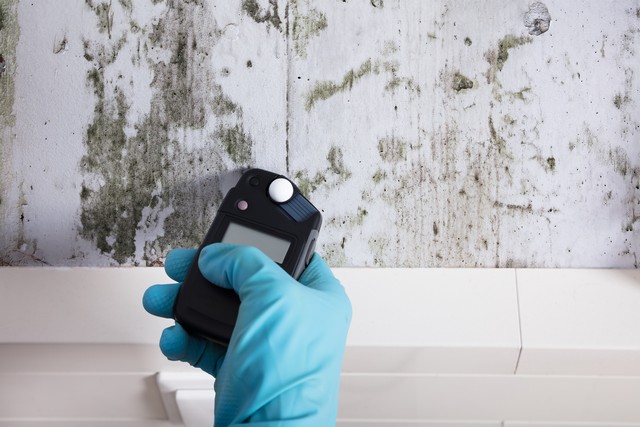
Patience is the key because clean up and drying takes time. If you rebuild before the drying process is complete, this could lead to mold and you want to avoid this. Measure the humidity level and ensure that the air is cleaned properly, verifying the efficacy of the clean up with a third party air quality test.
7. Ventilate
Cross-ventilate by opening windows at opposite ends to prevent excessive moisture which causes mold.
8. Check The Drainage Around Your Property
The last thing you want after you rebuild is to get mold again. For instance, if your basement has flooded, one of the most important steps is to ensure that water is not sloping towards the foundation of your home because if the basement walls are porous, moisture can get trapped, leading to mold. To avoid this from happening, make sure that the ground slopes away from the foundation walls of the home and your downspouts extend at least 6 feet away from the property.
9. Keep Humidity in Check
One of your best investments is to use a dehumidifier to remove excess moisture.
In addition, if your basement recently flooded you should waterproof it by sealing cracks in the floor and walls with hydraulic cement and a concrete waterproofing sealer where the floor meets the walls.
Got Water Damage or Mold Questions?
Got Water Damage or Mold Questions?


Recent Comments